Amber Purple: Cooling, Annealing, and What Happens After the Torch
The Work Doesn’t End When the Torch Turns Off
The work does not end when the torch turns off. With Amber Purple, the color you finish with at the bench is only part of the story. This is a striking glass, and that means the final result depends on heat history, flame atmosphere, surface condition, and what happens in the kiln afterward. Cooling and annealing are not just there to keep the piece from cracking. They are part of how the color settles, deepens, or gets lost.
Cooling Holds the Colour You Built
It helps to separate two different jobs that often get blended together. One job is color development. The other is structural annealing. Northstar’s general borosilicate chart puts the standard annealing temperature at 1050°F and the strain point at 960°F, with anneal time scaling by thickness. That means a proper post-torch cycle is not just one hold and done. The piece still needs time to stabilize after any strike work is finished. In thicker or more complex work, the first soak below anneal matters even more because that is where the structure starts to come into balance before the rest of the cool-down continues.
Surface Condition Before the Kiln
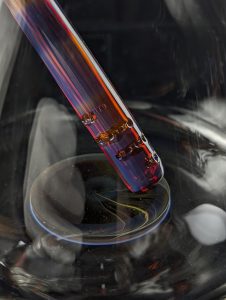
Before Amber Purple ever goes into the kiln for color development, the surface has to be clean. Northstar is very clear about this. The initial haze is reduced silver metal that leaves the body of the glass and deposits on the surface. If that layer is left in place, it thickens, turns matte gray, and masks the real color underneath. Their published procedure is to turn the work slowly in a strong sharp oxidizing flame and heat the surface aggressively enough that it almost boils, because that initial clean-up is the step everything else depends on. The kiln will not rescue a dirty surface. It will only develop what you gave it.
Flame Striking and Kiln Striking Are Not the Same Thing
Once the haze is removed, there are two different ways to push the color. If you want a gradient or a more selective look, Northstar’s flame-strike method is simple and very controlled: let the piece cool for about twenty seconds, wait until the glow is gone, then bring it back in a soft neutral flame so the surface barely glows. If you want it darker, repeat in short increments. That approach lines up with a broader striking pattern seen on the Glass Alchemy side too: reset the color hot, let it rest, then reintroduce heat in very small doses because short exposures can make large visible differences. Flame striking is best when you want control over where the color develops. Kiln striking is better when you want the color to develop more evenly through the piece.
The Kiln Range That Actually Matters
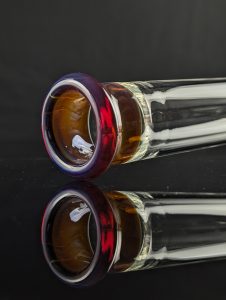
For Amber Purple itself, Northstar’s published kiln-strike window is more specific than the ranges people often repeat from shop talk. Their family page says to place haze-free, unstruck Amber Purple in the kiln and hold it at 1125°F to 1150°F for about sixty minutes, or until the desired intensity is reached. That hold is for color development, not for the final structural anneal. After that stage, the work still belongs on a proper borosilicate anneal path near 1050°F. Other makers’ amber-to-purple and silver-striking pages do reinforce the idea that extra kiln time around 1100°F can deepen certain colors, but those are adjacent formulations and should be treated as supporting evidence, not replacements for Northstar’s direct Amber Purple schedule.
Thin Work Needs More Restraint
This is the point where patience matters. Northstar explicitly warns that thinner work may slump at the published Amber Purple strike temperatures. Their older BoroNews issue also warns that even the initial haze-removal phase has to be done quickly enough to avoid boiling and slumping. In practice, that means the hotter kiln-strike window is powerful, but it is not something to apply casually across every form. Thin blown work, delicate details, and pieces that are already close to moving should be approached more carefully than heavier sculpture or thicker sections.
Common Problems After the Torch
Most problems in this stage trace back to one of four things. The first is poor oxidation when the goal was purple. Northstar’s current pages consistently point toward oxidizing or at least neutral-to-slightly oxidizing conditions for the strongest purples, while warning that reduction pushes the color toward milky amber, opacity, or other off-path results. The second is leftover haze. If the silver stays on the surface, the color goes gray and loses life. The third is confusing strike temperature with anneal temperature and skipping the structural soak after the color hold. The fourth is assuming the hot look is the final look. Across the other two source sets, the same pattern shows up again and again: some silver-striking colors look clearer while working, some need to be fully worked before purple will show, and some darken only after deliberate kiln time.
Carrying Control Through the Whole Cycle
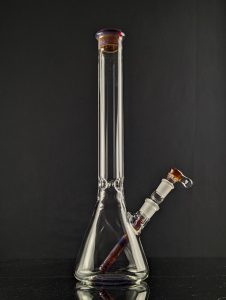
The real lesson here is that Amber Purple rewards continuity of control. You do not finish the color at the torch and then hand the rest of the job over to the kiln. You carry the same discipline all the way through: clean the surface completely, decide whether you want a flame gradient or a kiln-developed field of color, separate the strike hold from the structural anneal, and watch the form while the color is being pushed. That is how stronger saturation, cleaner purples, and more consistent results actually happen.
What Comes Next
Once the post-torch phase is understood, the next step is using that control on purpose. The next post can move into layering, encasement, and design choices, because that is where the color is not just preserved but directed. By that point, the question is no longer whether Amber Purple will strike. It is how intentionally you want it to do it.
